

Table of Contents
- Step 1: Pick Your Shirt Style and Fabric Weight
- Step 2: Choose Your Custom T-Shirt Printing Methods
- Step 3: Prepare Design Files for Custom Shirt Design
- Step 4: Use the Best Software for T-Shirt Design
- Step 5: Plan T-Shirt Design Ideas for Events
- Step 6: Understand Custom Shirt Design Pricing and Turnaround
- Common Mistakes to Avoid in Custom Shirt Design
- Conclusion
- Frequently Asked Questions
Last Updated: September 28, 2026
Step 1: Pick Your Shirt Style and Fabric Weight
Custom shirt design starts with the blank itself. Fabric weight, measured in grams per square metre, decides how a shirt drapes, breathes, and survives the wash. Get this wrong and no print will save the finished piece.
Here's the quick version:
- Lightweight (140-150 gsm): soft, drapey, best for fitted women's cuts and warm-weather wear
- Midweight (160-180 gsm): the everyday workhorse, holds shape, prints cleanly
- Heavyweight (200 gsm+): structured and opaque, ideal for boxy unisex tees
Most guides skip straight to printing and never mention this. That's backwards. A 145 gsm tee takes a fine-line design beautifully but shows every lump and bump of a thick ink layer. A 210 gsm tee swallows detail but carries bold graphics like a billboard.
Fit matters just as much. Women's cuts run narrower through the waist and shorter in the sleeve. Unisex runs straighter and longer. If you're ordering matching tees for a group, unisex sizing usually keeps everyone happier, and a size chart beats guessing every time.
At Wild Doe Tee Co, we build custom pieces on exactly this principle: start with the garment, then design for it. Our Sweatshirt or Teeshirt - Lash Boss sits in the Boss Babe collection at $30.00, a simple, chic everyday tee that takes a custom graphic without fighting it.

Step 2: Choose Your Custom T-Shirt Printing Methods
The best custom t-shirt printing method depends on your design's complexity, your quantity, and how long you need each shirt to last. Four techniques cover almost every project.
Screen printing pushes ink through a mesh stencil, one colour at a time. It's the standard for bulk orders because the cost per shirt drops sharply as quantity climbs. Ink sits on top of the fabric, so colours stay vivid, and properly cured prints outlast the shirt itself.
Direct to garment (DTG) works like an inkjet printer for fabric. It's ideal for full-colour, photographic designs and small runs, because there's no setup cost per colour. The trade-off is that DTG ink sits in the fibres and can fade faster on dark garments.
Heat transfer and vinyl cut or print a design onto a carrier sheet, then press it onto the shirt. Great for names, numbers, and one-off pieces. Cheap for singles, slow and costly at volume.
Embroidery stitches thread directly into the fabric. It's the premium choice for logos and apparel branding, and it never cracks or peels.
| Method | Best For | Setup Cost | Durability |
|---|---|---|---|
| Screen printing | Bulk orders, bold designs | High per colour | Excellent |
| Direct to garment | Photos, small runs | None | Moderate |
| Heat transfer | Names, one-offs | Low | Good |
| Embroidery | Logos, premium pieces | Medium | Excellent |
If you're weighing up print quality against budget, this table is where most decisions get made.
Step 3: Prepare Design Files for Custom Shirt Design
File preparation is where good custom shirt design either flies or fails. Send a screenshot and you'll get a blurry print. Send a proper vector file and the printer can scale it to any size without losing a single edge.
Vector graphics (.ai.eps.svg) use maths instead of pixels, so they stay razor-sharp at any size. Raster files (.png.jpg) are built from pixels and blur when enlarged. For logos and text, always go vector.
Three things to check before you send anything:
- Resolution: raster art should be at least 300 DPI at final print size
- Colour mode: supply CMYK for print, not RGB
- Transparency: flatten your file, or the printer may guess wrong
Graphic placement matters too. A print that sits too high looks like a mistake. Standard placement runs roughly 7-9 cm below the collar for a full-front design, though this shifts with garment size.
Step 4: Use the Best Software for T-Shirt Design
The best software for t-shirt design depends on how much control you want and what file type you need to hand off to a printer. Free browser tools get you a finished shirt in minutes. Professional software gives you print-ready vector files you can reuse forever.
Here's the practical breakdown:
- Online design studios (Canva, Printful's designer, Custom Ink's lab): drag-and-drop text and graphics, live mockups, no downloads. Best for events, one-off gifts, and anyone who doesn't want to learn a design program. Output is usually a raster PNG at a fixed resolution.
- Vector editors (Adobe Illustrator, Affinity Designer, Inkscape): output .ai, .eps, or .svg files that scale infinitely without losing sharpness. This is the standard for logos, text-heavy designs, and anything a screen printer will reproduce at multiple sizes.
- Raster editors (Adobe Photoshop, GIMP, Procreate): output .png or .jpg files built from pixels. Fine for photographic or full-colour DTG prints, but they blur when enlarged past their native resolution.
Three file-prep rules that separate a clean print from a blurry one:
Sweatshirt or Teeshirt - Lash Boss →
- Resolution: raster art should be at least 300 DPI at final print size. A 12-inch-wide print needs a file that's at least 3600 pixels wide.
- Colour mode: supply CMYK for print, not RGB. RGB files get converted by the printer, and the conversion can shift colours, especially bright greens and oranges.
- Transparency and layers: flatten your file before sending. Unflattened layers can cause the printer's software to guess wrong about what should be visible.
Graphic placement matters too. A print that sits too high looks like a mistake. Standard placement runs roughly 7-9 cm below the collar for a full-front design, though this shifts with garment size. For left-chest prints, the standard is about 7-10 cm down from the shoulder seam and 7-10 cm in from the centre.
The thing nobody tells you about design software is that the mockup lies. A design that looks huge on screen often prints smaller than expected. Always check the actual print dimensions in centimetres, not the on-screen preview. If your software doesn't show print dimensions, export the file and measure it in a separate tool before ordering.
You don't need to be artistic to get a great result, either. A clear idea, a font you like, and a colour palette are enough. If you only have a vague concept, that's fine. Bring it to a designer or a custom creation service and let them shape it.
Step 5: Plan T-Shirt Design Ideas for Events
T-shirt design ideas for events work best when they're built around one shared moment, not a generic slogan. The inside joke, the date, the group name: that's what makes a shirt feel personal instead of mass-produced.
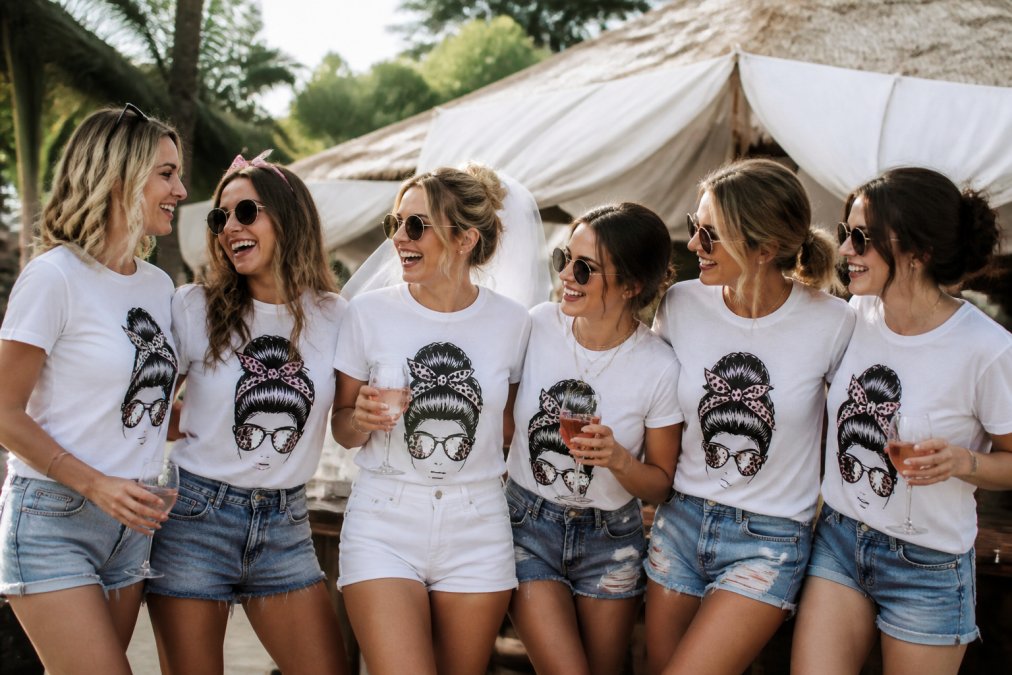
But the design idea is only half the decision. The other half is matching that idea to the right printing method, because a design that looks great on screen can fail on the wrong technique.
For a bachelorette party, matching tees double as photos and keepsakes. Put the bride's name or a cheeky phrase on the front and the date on the back. For baby showers, a soft design in a pastel palette works for the guest of honour and the guests alike.
A few angles that land well:
- Inside jokes: the phrase only your group understands
- Milestone dates: the year, the trip, the occasion
- Matching sets: same design, different roles (bride, maid of honour, guest)
Fabric choice interacts with all of this. A lightweight 145 gsm tee takes a fine-line screen print beautifully but shows every lump and bump of a thick ink layer. A heavyweight 210 gsm tee swallows fine detail but carries bold graphics like a billboard.
Custom merchandise for a group should feel like it belongs to that group alone. That's the whole point, and it's why non-mass-produced pieces beat anything you'd grab off a rack.
Step 6: Understand Custom Shirt Design Pricing and Turnaround
Custom shirt design pricing comes down to three variables: quantity, number of colours, and turnaround time. More shirts lower the per-unit cost. More colours raise it. Faster delivery raises it again.
Here's how the costs typically break down:
| Factor | Effect on Price | Why |
|---|---|---|
| Higher quantity | Lower cost per shirt | Setup cost spreads across more units |
| More ink colours | Higher cost per shirt | Each colour needs its own screen |
| Rush printing | Higher cost per shirt | Production gets prioritised |
| Embroidery | Higher cost per shirt | Slower, thread-based process |
| Local pickup | Lower shipping cost | No courier involved |
Turnaround time is where most planners get caught out.
Common Mistakes to Avoid in Custom Shirt Design
Most custom shirt design disasters trace back to the same handful of errors, and every one of them is avoidable.
Conclusion
Getting custom shirt design right is a sequence, not a single decision: pick the fabric, choose the method, prep the file, then plan for your event and your deadline.
Frequently Asked Questions
How much does it cost to get a custom made shirt?
Pricing depends on the shirt style, printing method, and quantity. At Wild Doe Tee Co, a custom tee like the Lash Boss starts at $30.00. Bulk pricing lowers the per-shirt cost for groups, and rush printing or specialty techniques add to the total. Always ask for a full quote that includes design help, shipping, and any setup fees before you commit.
What file format is best for custom shirt printing?
Vector graphics such as AI, EPS, or SVG are best because they scale without losing quality. If you only have a JPG or PNG, aim for at least 300 DPI at the final print size. For screen printing, separate colors into layers. For direct to garment, a high-resolution PNG with a transparent background works well. Sending the wrong file type is one of the most common reasons custom shirt design turns out blurry.
How do I choose the right printing method for my custom design?
Match the method to your design and quantity. If your artwork has gradients or fine detail, some methods give better print resolution. For bold, simple logos, some methods deliver better ink durability.
How long does turnaround time take for custom shirt orders?
If you are ordering for an event like a bachelorette party or baby shower, place your order with enough lead time. Local pickup may save shipping logistics time if you are nearby.